BookStack is an open source, web-based documentation system, that allows you to create a structured knowledge store for personal, team, or company use. BookStack focuses on ease-of-use and design to provide an experience suitable for an audience with, potentially, mixed skills in technology.
Application that need to be installed:
1
| sudo apt install php php-{curl,gd,mbstring,bcmath,mysql,xml,zip} apache2 mariadb-server pwgen git -y
|
With the above command you will install php and the required php extensions along with Apache web server, MariaDB database server, pwgen for generating passwords and git.
Download Composer
Composer Website
1
2
3
4
| php -r "copy('https://getcomposer.org/installer', 'composer-setup.php');"
php -r "if (hash_file('sha384', 'composer-setup.php') === 'e21205b207c3ff031906575712edab6f13eb0b361f2085f1f1237b7126d785e826a450292b6cfd1d64d92e6563bbde02') { echo 'Installer verified'; } else { echo 'Installer corrupt'; unlink('composer-setup.php'); } echo PHP_EOL;"
php composer-setup.php
php -r "unlink('composer-setup.php');"
|
To access Composer from any directory, you will want to move this file to a directory on your path:
1
| sudo mv composer.phar /usr/local/bin/composer
|
Download BookStack via GIT
Change into the Apache directory:
Make a new directory for the BookStack install:
Download BookStack via GIT using the new directory you created:
1
| sudo git clone https://github.com/BookStackApp/BookStack.git --branch release --single-branch bookstack
|
Go into the BookStack directory:
Install Bookstack:
1
| sudo composer install --no-dev
|
Once the install is complete, copy the .env.example file. This will be used later to set up the variable for the site:
1
| sudo cp .env.example .env
|
Create a Secure Password
Copy one of the generated passwords for use in creating your MariaDB database for BookStock
Secure you installion of MariaDB:
1
| sudo mysql_secure_installation
|
1
2
3
4
5
6
7
8
9
10
11
12
13
14
15
16
17
18
19
20
21
22
23
24
25
26
27
28
29
30
31
32
33
34
35
36
37
38
39
40
41
42
43
44
45
46
47
48
49
50
51
52
53
54
55
56
57
58
59
60
61
62
63
64
65
66
67
68
69
70
| sudo mysql_secure_installation
NOTE: RUNNING ALL PARTS OF THIS SCRIPT IS RECOMMENDED FOR ALL MariaDB
SERVERS IN PRODUCTION USE! PLEASE READ EACH STEP CAREFULLY!
In order to log into MariaDB to secure it, we'll need the current
password for the root user. If you've just installed MariaDB, and
haven't set the root password yet, you should just press enter here.
Enter current password for root (enter for none):
OK, successfully used password, moving on...
Setting the root password or using the unix_socket ensures that nobody
can log into the MariaDB root user without the proper authorisation.
You already have your root account protected, so you can safely answer 'n'.
Switch to unix_socket authentication [Y/n] Y
Enabled successfully!
Reloading privilege tables..
... Success!
You already have your root account protected, so you can safely answer 'n'.
Change the root password? [Y/n] Y
New password:
Re-enter new password:
Password updated successfully!
Reloading privilege tables..
... Success!
By default, a MariaDB installation has an anonymous user, allowing anyone
to log into MariaDB without having to have a user account created for
them. This is intended only for testing, and to make the installation
go a bit smoother. You should remove them before moving into a
production environment.
Remove anonymous users? [Y/n] Y
... Success!
Normally, root should only be allowed to connect from 'localhost'. This
ensures that someone cannot guess at the root password from the network.
Disallow root login remotely? [Y/n] Y
... Success!
By default, MariaDB comes with a database named 'test' that anyone can
access. This is also intended only for testing, and should be removed
before moving into a production environment.
Remove test database and access to it? [Y/n] Y
- Dropping test database...
... Success!
- Removing privileges on test database...
... Success!
Reloading the privilege tables will ensure that all changes made so far
will take effect immediately.
Reload privilege tables now? [Y/n] Y
... Success!
Cleaning up...
All done! If you've completed all of the above steps, your MariaDB
installation should now be secure.
Thanks for using MariaDB!
|
Access MariaDB database:
1
2
3
4
5
| create database bookstack;
create user bookstack@localhost identified by 'Password_Created_Using_PWGen';
grant all privileges on bookstack.* to bookstack@localhost;
flush privileges;
exit;
|
Fill in the APP_URL and the Database details:
1
2
3
4
5
6
7
| APP_URL=http://192.168.0.0 (Your IP address or Domain)
# Database details
DB_HOST=localhost
DB_DATABASE=bookstack
DB_USERNAME=bookstack
DB_PASSWORD=Password_From_Above_Step
|
Set Permissions for BookStack Folders
1
2
3
4
5
6
7
8
9
10
11
12
| # Set the bookstack folders and files to be owned by the user barry and have the group www-data
sudo chown -R www-data:www-data /var/www/bookstack
# Set all bookstack files and folders to be readable, writeable & executable by the user (barry) and
# readable & executable by the group and everyone else
sudo chmod -R 755 /var/www/bookstack
# For the listed directories, grant the group (www-data) write-access
sudo chmod -R 775 /var/www/bookstack/storage /var/www/bookstack/bootstrap/cache /var/www/bookstack/public/uploads
# Limit the .env file to only be readable by the user and group, and only writable by the user.
sudo chmod 640 /var/www/bookstack/.env
|
In the application root, run the following command to generate a unique application key that will automatically get placed in the .env file:
1
| sudo php artisan key:generate
|
BookStack Apache VirtualHost File
1
| sudo nano /etc/apache2/sites-available/bookstack.conf
|
Place the following into the file changing the ServerName to your own:
1
2
3
4
5
6
7
8
9
10
11
12
13
14
15
16
17
18
19
20
21
22
23
24
25
26
27
28
29
30
31
32
33
34
35
36
37
38
39
40
41
42
43
44
45
46
47
48
49
| <VirtualHost *:80>
# This is a simple example of an Apache VirtualHost configuration
# file that could be used with BookStack.
# This assumes mod_php has been installed and is loaded.
#
# Change the "docs.example.com" usage in the "ServerName" directive
# to be your web domain for BookStack.
#
# Change the "/var/www/bookstack/public/", used twice below, to the
# location of the "public" folder within your BookStack installation.
#
# This configuration is only for HTTP, Not HTTPS.
# For HTTPS we recommend using https://certbot.eff.org/
ServerName docs.example.com
DocumentRoot /var/www/bookstack/public/
<Directory /var/www/bookstack/public/>
Options Indexes FollowSymLinks
AllowOverride None
Require all granted
<IfModule mod_rewrite.c>
<IfModule mod_negotiation.c>
Options -MultiViews -Indexes
</IfModule>
RewriteEngine On
# Handle Authorization Header
RewriteCond %{HTTP:Authorization} .
RewriteRule .* - [E=HTTP_AUTHORIZATION:%{HTTP:Authorization}]
# Redirect Trailing Slashes If Not A Folder...
RewriteCond %{REQUEST_FILENAME} !-d
RewriteCond %{REQUEST_URI} (.+)/$
RewriteRule ^ %1 [L,R=301]
# Handle Front Controller...
RewriteCond %{REQUEST_FILENAME} !-d
RewriteCond %{REQUEST_FILENAME} !-f
RewriteRule ^ index.php [L]
</IfModule>
</Directory>
ErrorLog ${APACHE_LOG_DIR}/error.log
CustomLog ${APACHE_LOG_DIR}/access.log combined
</VirtualHost>
|
This command will remove the default Apache site:
1
| sudo a2dissite 000-default.conf
|
This will create the new site in Apache:
1
| sudo a2ensite bookstack.conf
|
This will enable the rewrite mode required for BookStack:
Restart Apache
1
| sudo systemctl restart apache2
|
Run this command to update the database:
1
| sudo php artisan migrate
|
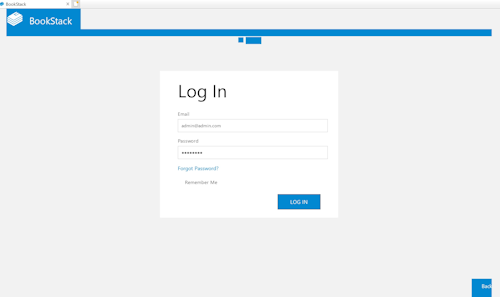
Installation is now complete. You can now login using the default admin details [email protected] with a password of password. You should change these details immediately after logging in for the first time.