Jekyll Install - Ubuntu 22.04
Install Dependencies for Jekyll
1
sudo apt-get install ruby-full build-essential zlib1g-dev git -y
Avoid installing RubyGems packages (called gems) as the root user. Instead, set up a gem installation directory for your user account. The following commands will add environment variables to your ~/.bashrc file to configure the gem installation path:
1
2
3
4
echo '# Install Ruby Gems to ~/gems' >> ~/.bashrc
echo 'export GEM_HOME="$HOME/gems"' >> ~/.bashrc
echo 'export PATH="$HOME/gems/bin:$PATH"' >> ~/.bashrc
source ~/.bashrc
Install Jekyll and Bundler:
1
gem install jekyll bundler
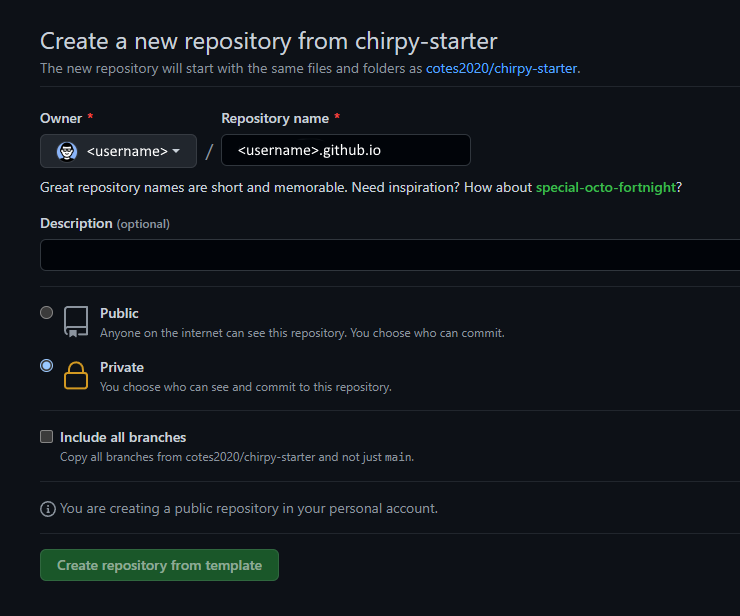
Install Chirpy Theme
Create a new repository from the Chirpy Starter and name it <Github Username>.github.io
Once the site based on the template has been created, clone your repo using the https method. The way I did it was to create a token which is explained on the Github site here. You can use the token in place of your username and password for github.
1
git clone https://github.com/<username>/<repo-name>.github.io.git
Once this is completed, you will then need to go to the root direcotry of your site. In my case:
1
cd <username>.github.io
Before running your site for the first time, you will need to install dependencies as follows:
1
bundle
Running Local Server
Run the following command in the root directory of the site:
1
$ bundle exec jekyll s
As I can’t always remember the command that is necessary to run the site, I created a script (server.sh) to handle it for me:
1
2
#!/bin/bash
jekyll server --host=0.0.0.0
Note: The default port with Jekyll is 127.0.0.1. Adding --host=0.0.0.0 will allow you to run it from the IP of the server.
To make the file executable, run this command:
1
chmod +x server.sh
To run the command:
1
./server.sh
Once you are finished setting up the site and adding your pages, I created another script to build the site and called it, what else, build.sh:
1
2
#!/bin/bash
jekyll build
To make the file executable, run this command:
1
chmod +x build.sh
To run the command:
1
./build.sh
Running it on Nginx
Install Nginx:
1
sudo apt install nginx -y
Next, I created another script (publish.sh) file to copy the site to the default Nginx folder:
1
2
#!/bin/bash
sudo cp -R /home/user/userid.github.io/_site/* /var/www/html/
So, first I would run ./server.sh and have the site up and running so I can add any new docuemnts, then run ./build.sh when that’s completed. Then I would run ./publish.sh and have the _site directory copied to Nginx. This is the way I do it. There is probably a better way or a way to automate this but I just haven’t had time to figure that out yet. Will update this page if I do.